 Save to feedthepins
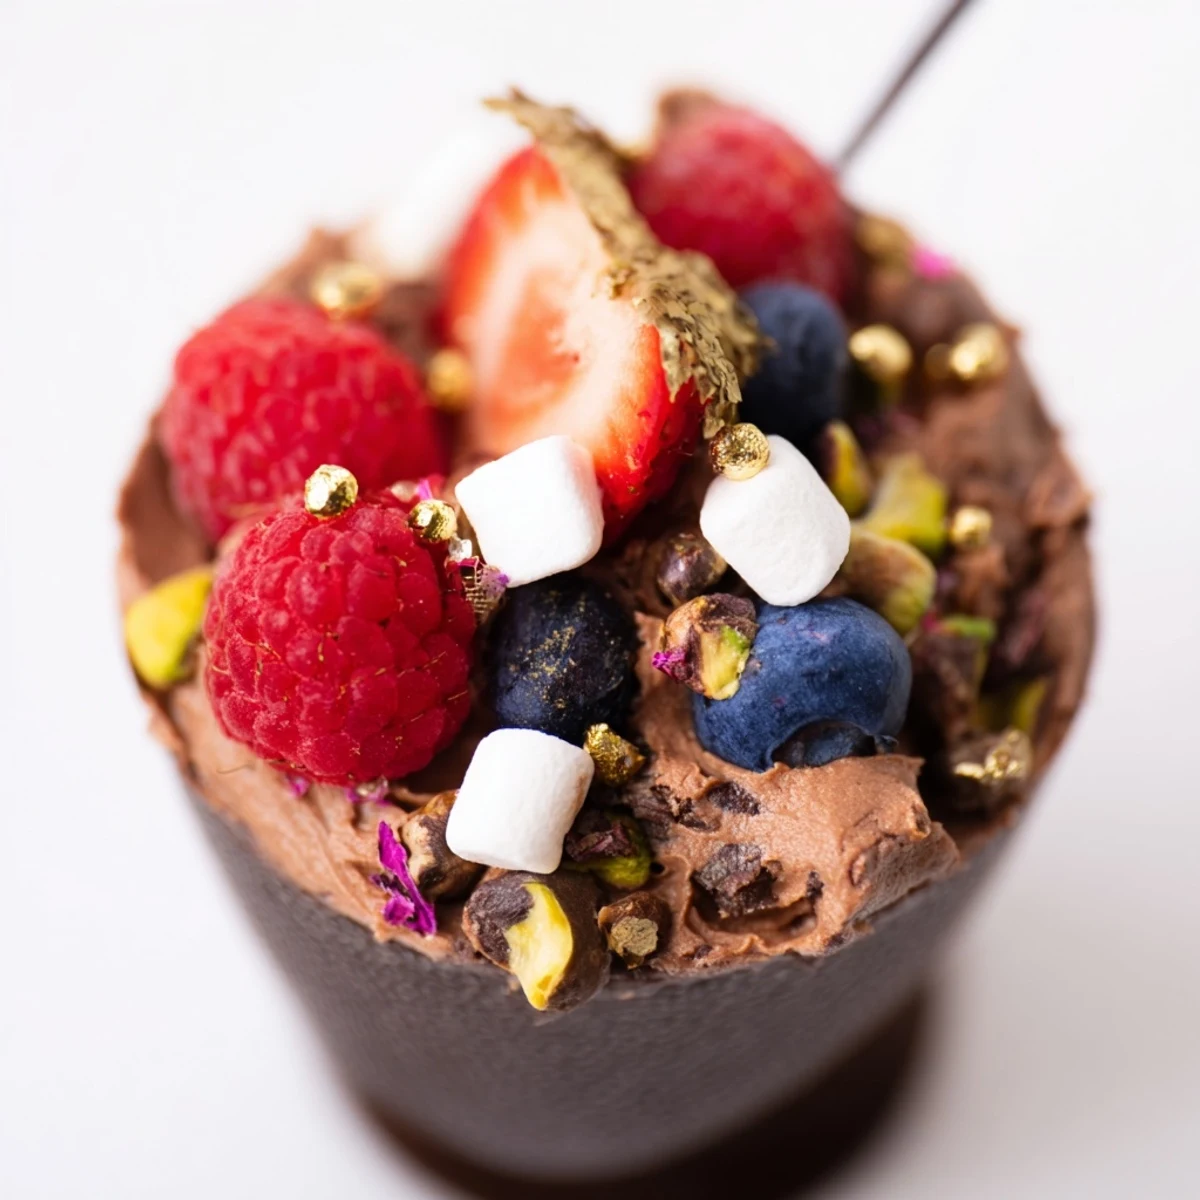
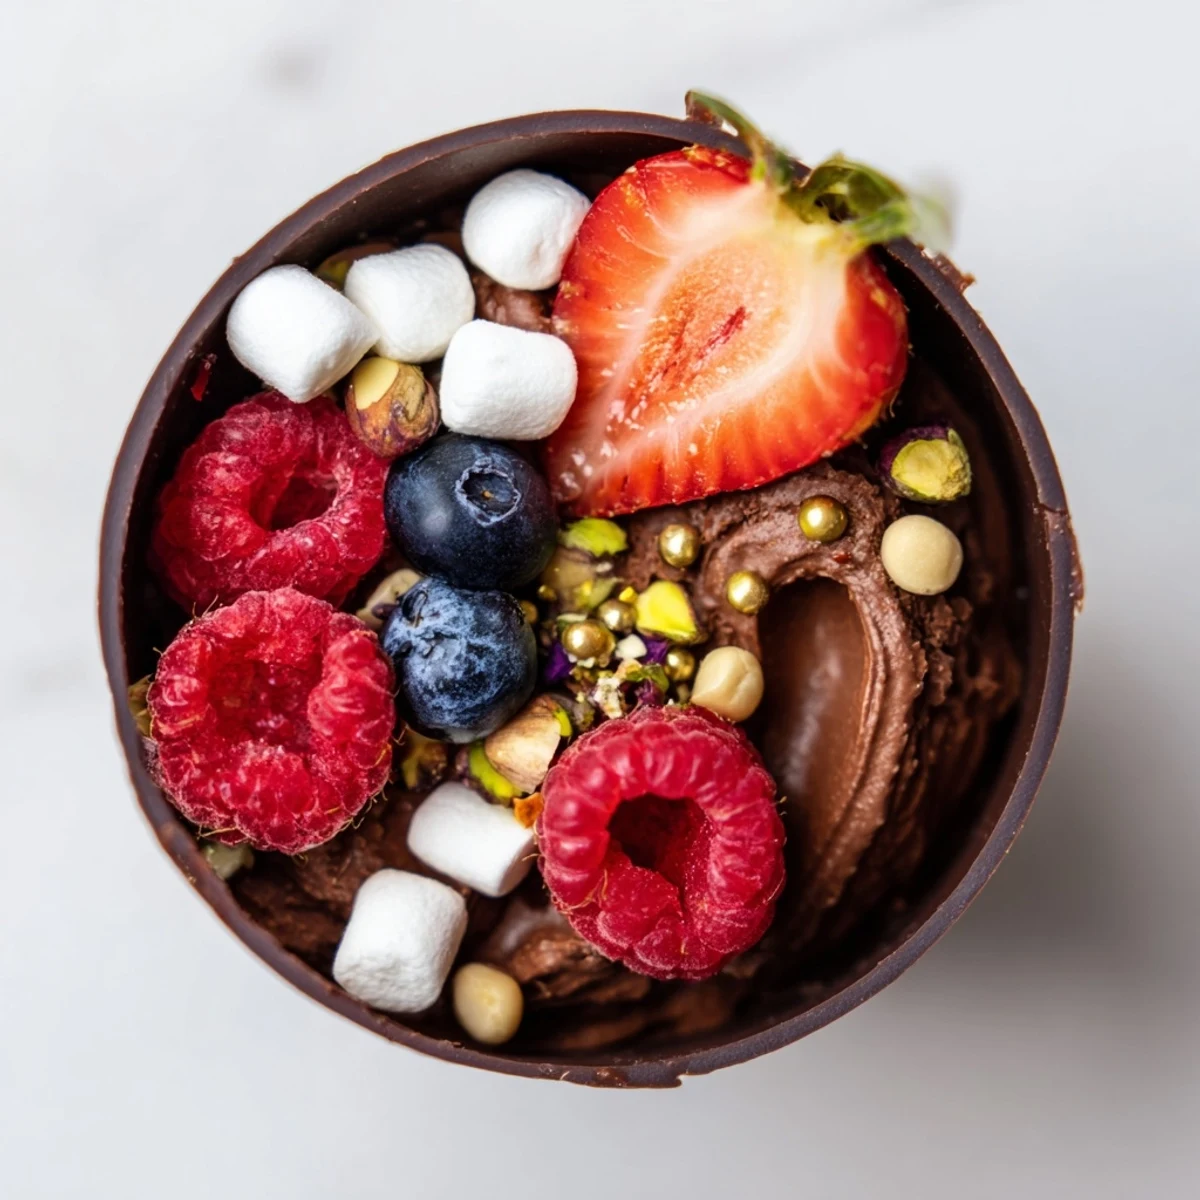
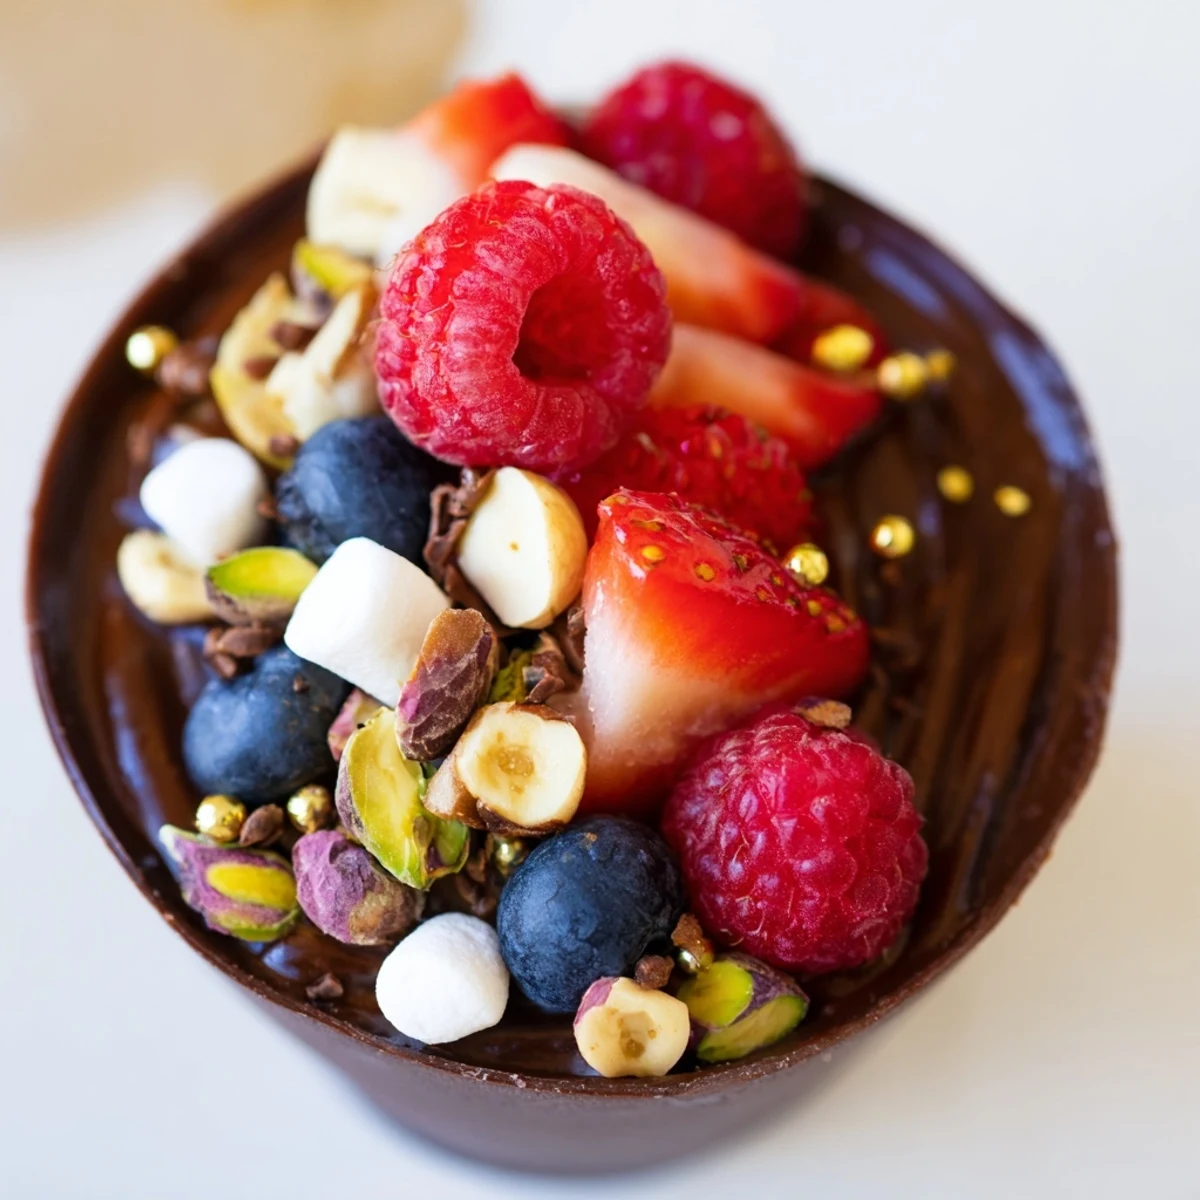
 Create stunning individual chocolate cups filled with silky mousse and topped with fresh berries, nuts, and marshmallows. These elegant desserts feature handmade dark chocolate shells filled with whipped chocolate mousse, then generously garnished with colorful mixed berries, toasted nuts, mini marshmallows, and chocolate curls. Perfect for dessert tables, dinner parties, or special celebrations, these grazing cups combine luxurious presentation with incredible flavors. The contrast between crisp chocolate shells, creamy mousse, juicy berries, and crunchy toppings creates an irresistible texture experience. Serve chilled and watch guests delight in these beautiful, indulgent treats.
The first time I attempted chocolate cups, I ended up with chocolate dripping down my arms and a kitchen that looked like a confectionery crime scene. But when those cups finally set and I spooned in that silky mousse, something magical happened. My dinner guests went silent for a full minute, just savoring each bite. That's when I knew these elegant little vessels were worth every moment of mess.
Last New Year's Eve, I set up a grazing table with these cups and watched my usually reserved aunt light up like a kid in a candy store. She spent ten minutes carefully arranging her toppings, creating what she called her masterpiece dessert. Sometimes the most elegant recipes bring out the playful side in everyone.
Ingredients
- 200 g dark chocolate (at least 60% cocoa): Higher cocoa percentage gives your cups structural integrity and that sophisticated bittersweet depth that balances sweet toppings
- 200 ml heavy cream: Cold cream whips up faster and holds its structure better, so pop it in the freezer for 10 minutes before starting
- 100 g dark chocolate: This forms the base of your mousse, so use chocolate you'd happily eat straight from the bar
- 2 tbsp powdered sugar: Powdered sugar dissolves seamlessly into the cream without those pesky granulated sugar crystals
- 1 tsp vanilla extract: Pure vanilla extract makes all the difference here, amplifying the chocolate's natural complexity
- 1 cup fresh mixed berries: The tart berries cut through the rich chocolate, creating those perfect sweet-tangy moments
- 2 tbsp chopped nuts: Toast your nuts lightly beforehand to unlock their natural oils and deepen their flavor
- 2 tbsp mini marshmallows: These add nostalgic whimsy and satisfying pillowy bites
- 2 tbsp chocolate curls: Use a vegetable peeler on room-temperature chocolate for picture-perfect curls
- 1 tbsp edible gold leaf: Completely optional but turns these into showstoppers worthy of any celebration
Instructions
- Craft Your Chocolate Vessels:
- Melt the 200g dark chocolate in 30-second bursts, stirring between each, until it flows like warm honey. Working quickly but deliberately, paint the insides of your liners with a pastry brush, ensuring the chocolate reaches the rim and creates an even foundation. Pop them in the fridge for 20 minutes until they click when tapped gently.
- Whip Up Cloud-Like Mousse:
- Melt your remaining chocolate and let it cool to room temperature, about 5 minutes. In a chilled bowl, whip that cold cream with sugar and vanilla until soft peaks form, then fold in a spoonful of cream to temper the chocolate before gently incorporating the rest.
- Build Your Dessert Masterpieces:
- Pipe or spoon the mousse into each chocolate cup, leaving enough room for your gorgeous toppings to shine. Arrange the berries, nuts, marshmallows, and chocolate curls like tiny edible works of art, finishing with gold leaf if you're feeling fancy.
- The Final Chill:
- Let the assembled cups rest in the refrigerator for at least 20 minutes, which helps the mousse set and allows all those flavors to become acquainted. Serve them straight from the fridge for the most satisfying snap when you break through that chocolate shell.
 Save to feedthepins
 My daughter now requests these for every birthday, and watching her carefully arrange each topping with such concentration has become one of my favorite kitchen traditions. Food that brings people together, even in the making of it, is always the most memorable kind.
Make It Your Own
White chocolate cups with lemon mousse and fresh berries create an entirely different but equally stunning experience. Or try milk chocolate vessels filled with peanut butter mousse and topped with banana slices for a childhood favorite elevated to dessert status.
Perfect Pairings
A ruby port creates those luxurious dining-at-home moments, though an espresso served alongside makes for a sophisticated end to any dinner party. The key is balancing the rich chocolate with something that either complements or contrasts its intensity.
Timing Is Everything
These cups taste best within a few hours of assembly, before the chocolate starts to soften from the mousse's moisture. Plan your timeline carefully and have all your toppings prepped and ready before you start assembling.
- Set up your topping station before you begin assembly
- Keep everything chilled until the moment of serving
- Have your serving platter ready before you start filling the cups
 Save to feedthepins
 There's something deeply satisfying about eating an edible container, and watching guests realize they can devour every last bit never gets old. Pure chocolate joy from start to finish.
Recipe Q&A
- → How far in advance can I make chocolate grazing cups?
-
For optimal texture and freshness, prepare these cups on the day you plan to serve them. The chocolate shells can be made up to 2 days ahead and stored in an airtight container, but fill with mousse and add toppings within 4-6 hours of serving to prevent the chocolate from softening and berries from releasing moisture.
- → Can I use different types of chocolate for the cups?
-
Absolutely. While dark chocolate provides a rich, intense flavor that balances sweet toppings, you can substitute milk or white chocolate for the cups. Keep in mind that white chocolate is softer and may require additional chilling time to set properly. You can even mix different chocolate types for visual variety.
- → What other toppings work well with chocolate grazing cups?
-
Beyond berries and nuts, consider adding crushed cookies, pretzels for salt contrast, shaved coconut, caramel drizzle, or fresh mint leaves. Seasonal fruits like pomegranate seeds, kiwi, or sliced stone fruits work beautifully. For adult gatherings, consider candied ginger, citrus zest, or a dusting of sea salt.
- → Do I need special molds to make chocolate cups?
-
No special equipment required. Silicone or paper cupcake liners work perfectly as molds. The key is coating them evenly with melted chocolate using a pastry brush or spoon, then chilling until completely set. Silicone liners peel away easily, while paper liners can be gently torn off once the chocolate is firm.
- → How do I prevent the chocolate from seizing when melting?
-
Melt chocolate slowly using low power in the microwave (15-30 second intervals) or over a double boiler with gentle, barely simmering water. Avoid getting any water or steam in the chocolate, as even a drop can cause seizing. Stir frequently and remove from heat just before completely melted, then continue stirring until smooth.
- → Can I make these without dairy?
-
Yes, substitute coconut cream or full-fat canned coconut milk for heavy cream in the mousse. Use dairy-free dark chocolate (many brands are naturally vegan, but check labels for milk powder). Coconut cream whips beautifully and creates a luscious mousse, though it will have a subtle coconut flavor.
