 Save to feedthepins
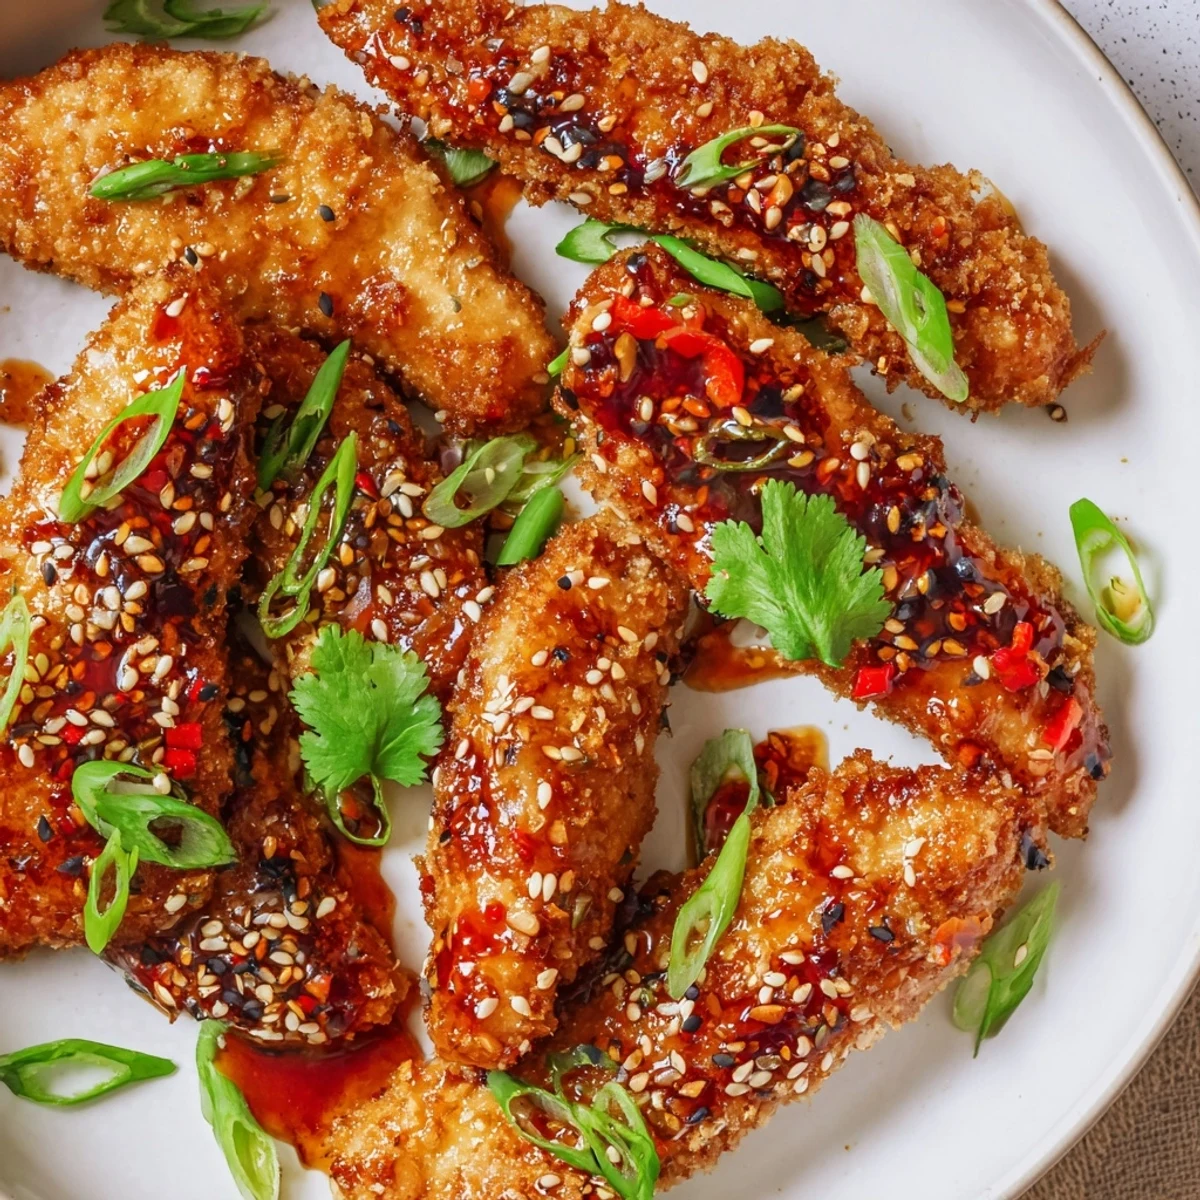
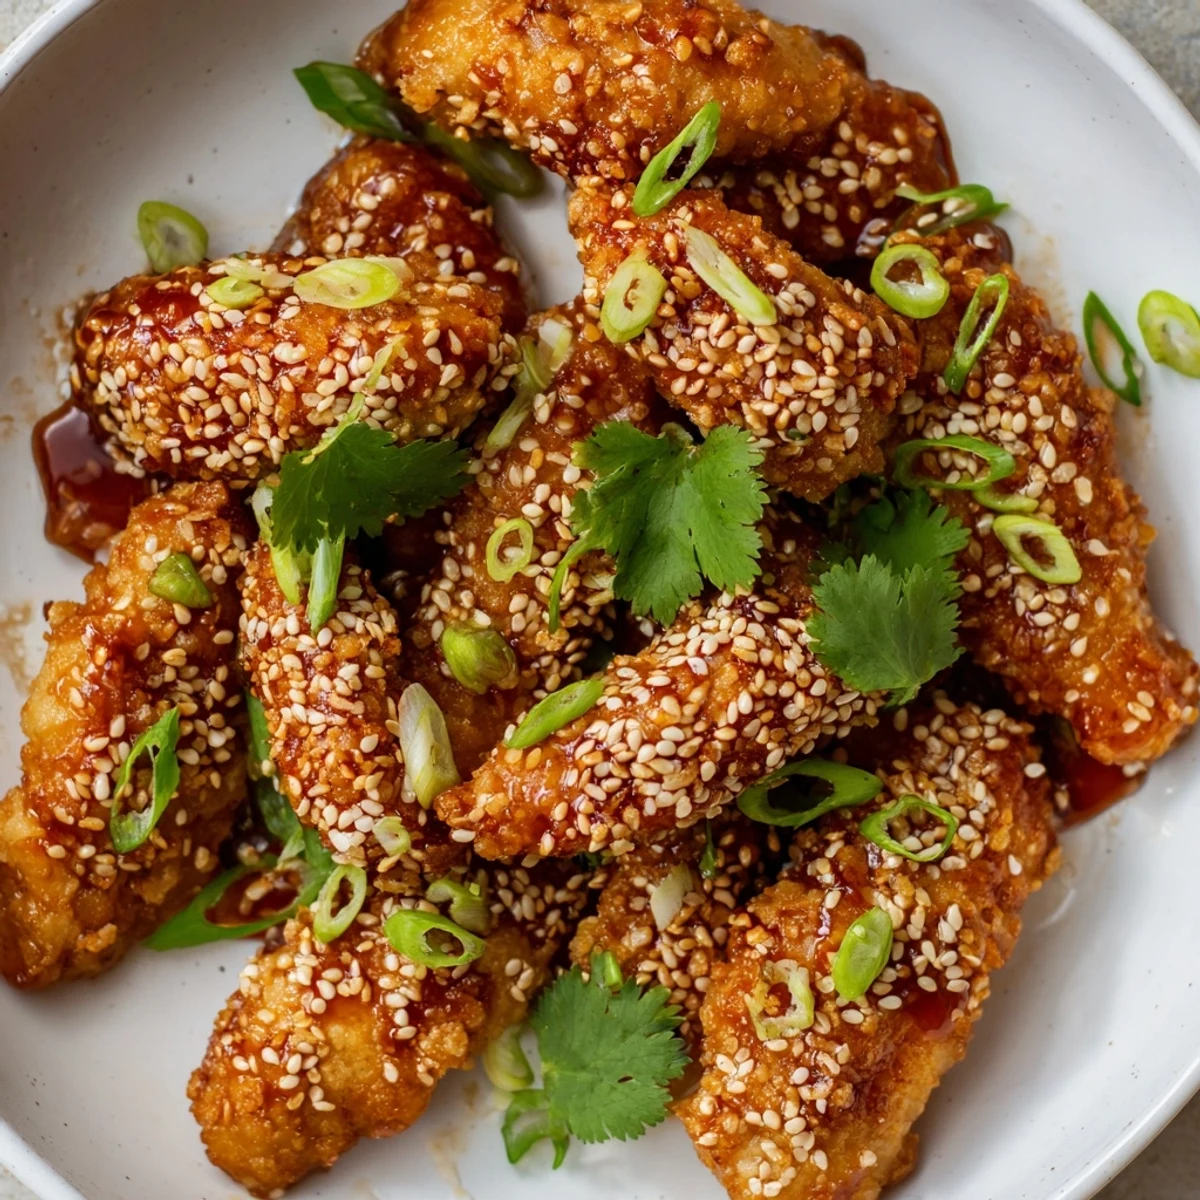
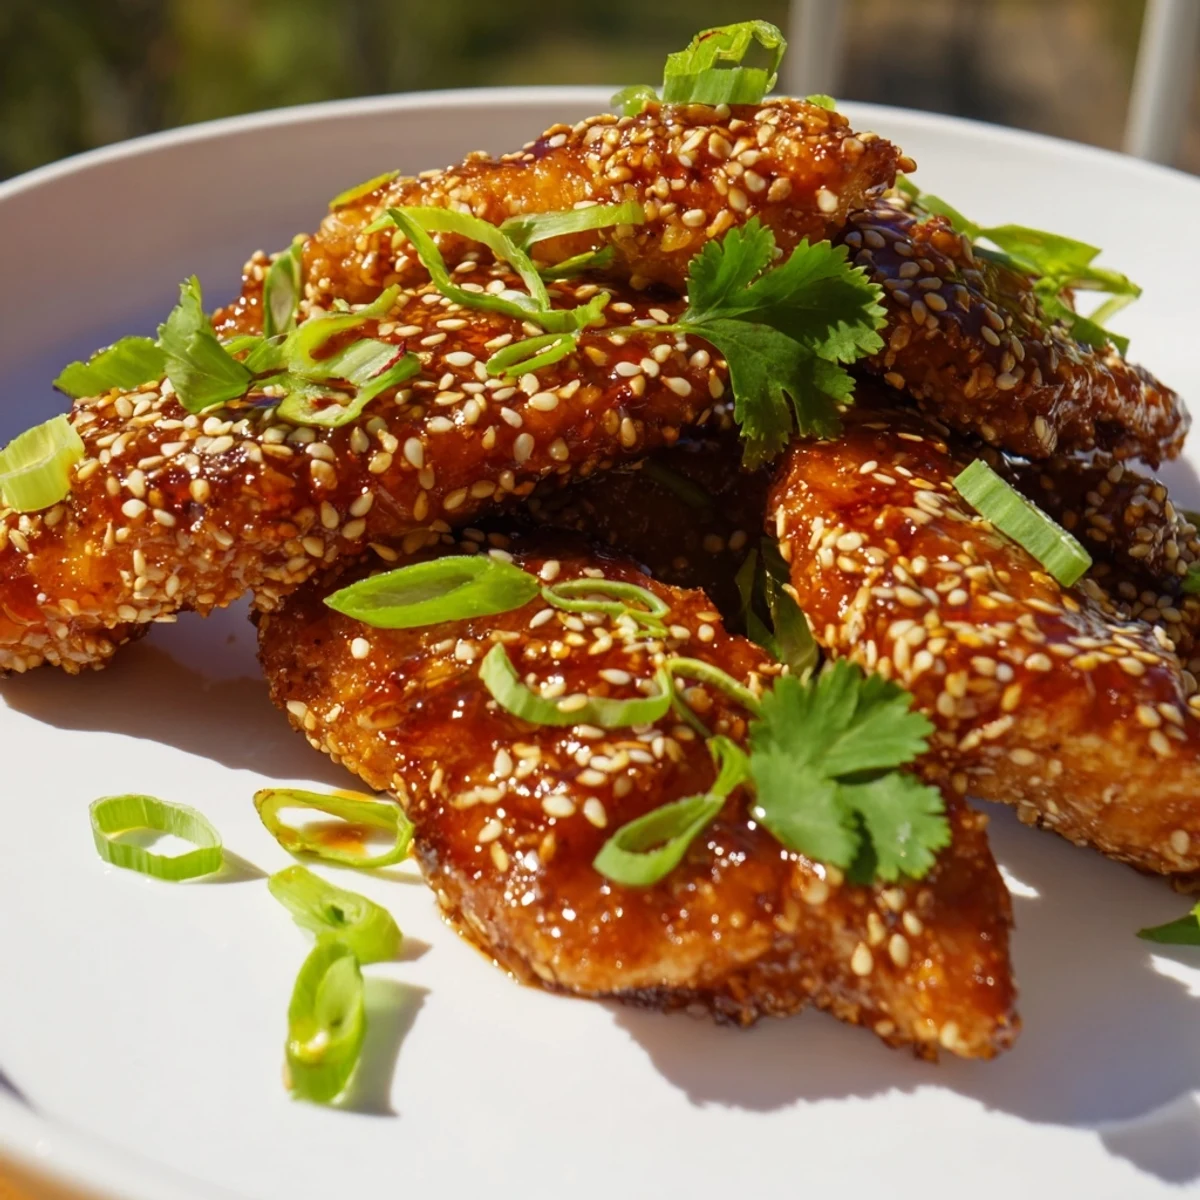
 These chicken fingers start with tender strips seasoned and coated in a three-step breading process: flour, egg, then panko mixed with garlic powder and smoked paprika. After baking until golden and crispy, they're tossed in a warm sauce made from sweet chili, soy sauce, honey, rice vinegar, sesame oil, sriracha, garlic, and fresh ginger. The result is irresistibly sticky fingers with a perfect balance of sweet and heat.
The panko coating stays crunchy even after saucing, while the Thai glaze adds glossy shine and complex flavor. Finished with toasted sesame seeds, spring onions, and fresh cilantro for extra color and aroma.
Last summer my friend Emma came over for what was supposed to be quick takeout and I ended up making these chicken fingers on a whim because Id bought way too much panko that week. We stood around the kitchen island eating them straight from the baking tray, burning our fingers slightly and not caring at all. Now she requests them every single time she visits and honestly I do too because the house smells incredible while they cook.
I made these for a Super Bowl party once and forgot to put out the rest of the food because everyone kept gathering around the platter. My brother actually asked if Id ordered them from a restaurant and refused to believe Id baked them myself until I showed him the messy bowls still sitting in my sink.
Ingredients
- Chicken tenders or breasts: Fresh chicken works best here but thawed frozen is completely fine, just pat them really dry so the coating sticks properly
- Salt and black pepper: Dont skip seasoning the meat itself since the coating needs that foundation underneath
- All-purpose flour: This first coat is what helps the egg grab onto the chicken and creates the crunch base
- Eggs: Room temperature eggs adhere better to both the flour and the panko layers
- Panko breadcrumbs: Japanese panko creates that impossibly light and crispy texture regular breadcrumbs cant achieve
- Garlic powder and smoked paprika: These season the breading so every bite has flavor even without the sauce
- Sweet chili sauce: The backbone of the glaze and you can find it in any Asian aisle or international market
- Soy sauce: Use a good quality brand here since youre really tasting it in the final sauce
- Honey: Balances the acidity and helps create that gorgeous sticky coating on the chicken
- Rice vinegar: Adds necessary brightness and cuts through the sweet elements
- Sesame oil: A little goes a long way and gives the sauce that restaurant depth
- Fresh garlic and ginger: Fresh is absolutely worth it here and makes the sauce taste alive
- Sesame seeds and spring onions: These finish the dish with visual appeal and a fresh bite
Instructions
- Get your oven ready:
- Preheat to 220°C (425°F) and line your baking tray with parchment paper because cleanup will be so much easier
- Season the chicken:
- Sprinkle salt and pepper over both sides of your chicken strips and let them sit while you prep everything else
- Set up your coating station:
- Arrange three shallow bowls in order: flour first, then beaten eggs, then panko mixed with garlic powder and smoked paprika
- Coat each piece:
- Dredge chicken in flour, shake off excess, dip in egg, then press firmly into the panko mixture until well coated
- Arrange and prep for baking:
- Place the coated strips on your prepared tray and give them a quick spray or light brush of oil for extra golden color
- Bake until golden:
- Cook for 20 to 25 minutes, turning halfway through, until the chicken is cooked through and beautifully crispy
- Make the sauce:
- While chicken bakes, combine sweet chili sauce, soy sauce, honey, rice vinegar, sesame oil, sriracha, garlic, and ginger in a small saucepan
- Simmer and thicken:
- Bring the sauce to a simmer over medium heat, stirring constantly for 2 to 3 minutes until it thickens slightly
- Coat and serve:
- Toss the hot chicken in the warm sauce gently, then arrange on a platter and scatter with sesame seeds, spring onions, and cilantro
 Save to feedthepins
 My daughter helped me make these last weekend and she took her job as official panko presser very seriously. She kept sneaking samples of the sauce and declared it better than the version from our favorite Thai place.
Making Them Extra Crispy
The broiler trick from the notes is absolute magic, just watch them like a hawk because they go from perfect to burned in about thirty seconds. I set a timer for one minute per side and that gives me the crunch without the risk.
Sauce Adjustments
Start with half the sriracha if youre serving people who are sensitive to heat, and remember you can always add more but you cannot take it back. The sauce keeps beautifully in the fridge for about a week and is actually incredible on salmon or roasted vegetables too.
Serving Ideas
These disappear fast at parties but they also work surprisingly well as a main dish with jasmine rice and some steamed broccoli. The sauce clings to the rice and suddenly you have a complete meal that feels fancier than it really is.
- Cucumber sticks with a sprinkle of rice vinegar make the perfect cooling side
- Extra lime wedges on the plate let people adjust the brightness to their taste
- Leftovers (if you somehow have them) reheat surprisingly well in an air fryer
 Save to feedthepins
 Hope these bring as much joy to your table as they have to mine. Happy cooking and enjoy every sticky, sweet, crispy bite.
Recipe Q&A
- → How do I keep the coating crispy after adding the sauce?
-
The panko breadcrumbs create a sturdy, airy coating that maintains crunch even when tossed in sauce. Bake until fully golden and allow the sauce to thicken slightly before coating for best results.
- → Can I make these spicy?
-
Add extra sriracha to the glaze or incorporate red pepper flakes into the panko mixture. The heat level is easily adjustable to your preference.
- → What's the best way to reheat leftovers?
-
Reheat in a 200°C oven for 8-10 minutes to restore crispiness. Avoid microwaving as the coating will become soggy.
- → Can I fry these instead of baking?
-
Yes, fry in 180°C oil for 3-4 minutes until golden brown. Drain well before tossing in the warm Thai glaze.
- → What pairs well with these chicken fingers?
-
Jasmine rice, fresh vegetable sticks, or a simple cucumber salad help balance the sweet and spicy flavors. Also excellent with chilled Riesling or light lager.
- → How long does the sauce stay fresh?
-
The sticky Thai sauce can be made up to 5 days ahead and stored refrigerated in an airtight container. Warm gently before tossing with the chicken.
